You have 0 items in your cart
Disclosure: This article contains affiliate links. When you click an affiliate link and make a purchase, we may earn a commission at no additional cost to you. These commissions help support and maintain our business. Thank you for your support!
Putting ear seeds on your own ears and letting them work their magic is such a satisfying experience…as long as you know what you’re doing. In this article, we’ll teach you how to apply ear seeds step by step so you have the confidence you need to add ear seeding into your daily self care routine!
Step 1: Prepare your environment
For some, this step might seem unnecessary. For a mother with three children, including an 8-month-old crawling around the house, choosing a time and place to apply ear seeds is not easy. Our best recommendation is to try, as best you can, to find a quiet place with good lighting. Ear seeding time is self-care time, so minimize distractions as much as possible to enhance your experience and improve your focus.
Step 2: Wash your hands
The next instruction to apply ear seeds step by step is to wash your hands. When touching any part of your face (eyes, ears, nose, mouth, especially) you want to start with clean hands that have been scrubbed with soap and water for at least 15 seconds. If you’re at an acupuncture or acupressure clinic receiving ear seeds, your practitioner will most likely be wearing gloves to ensure a sanitary seeding session.
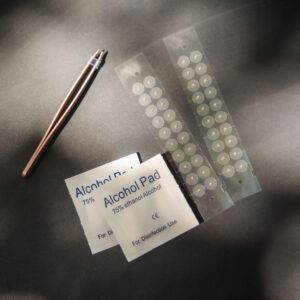
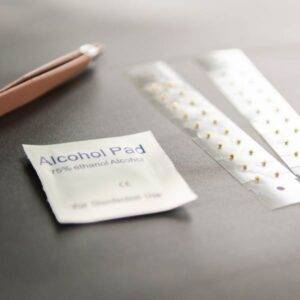
Step 3: Gather all your ear seeding materials
Get all the tools in one place prior to starting your DIY ear seeding. Coming prepared to apply ear seeds step by step will expedite the time it takes to seed your ears. Need to purchase ear seeds? Grab the My First Ear Seeds Kit here!
Here’s what you need:
- 6 to 10 ear seeds — if you’re new to ear seeds, plan to start with 3 or 4 per ear (and maybe have a couple of extra seeds on hand if you mess up, which is not uncommon and totally okay for your first time!)
- A pair of tweezers — make sure they’re in good condition and not dull
- An alcohol wipe — this is for rubbing the oil off the ears to help them last longer on the ears
- A mirror that you don’t need your hands to hold up — use a bathroom mirror or another type of freestanding mirror; if using your phone’s camera, lean it against something or put it in a tripod
- An accurate ear seed placement chart — the key to effective ear seeding is knowing where on the ears to place the seeds; if you are unsure about how or where to get started with the ear seeds and need some guidance, our virtual ear seeds consultation is just what you need
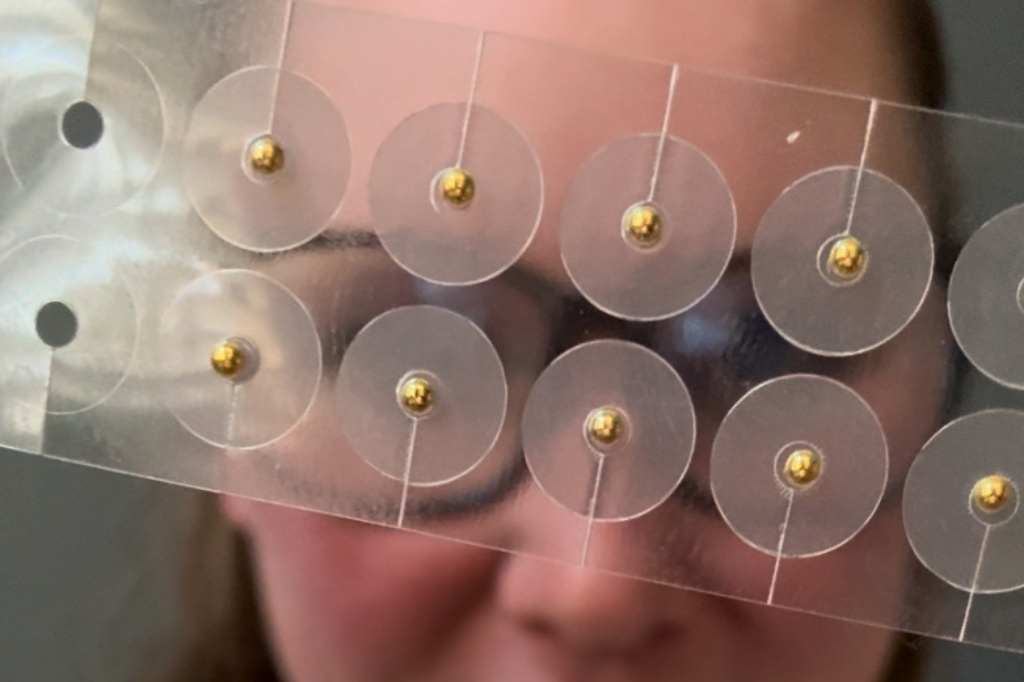
Step 4: Open the package and slide the ear seeds out
The seeds we sell come in a package, sealed for safety. So you just need to open the end of that and gently ease the strip of ear seeds out. You use the tweezers to assist in pulling them out if they’re particularly stubborn. Important note: when you’re done seeding, do not try to put the strip with remaining seeds back into the plastic package they were originally in. Doing this will cause the bead part of the seed to separate from the adhesive sticker, resulting in an unusable, wasted ear seed.
Step 5: Lift the seed off the plastic strip and apply it to your ear
At this point in the ear seeds step by step process, you’re ready to take the tweezers and lift the round adhesive sticker of the ear seed off the plastic strip. You might need to either twist the backing or twist the tweezers (or both) to finagle the seed off, but go slow and don’t force anything.
Once you have the seed on the tweezers, look at your ear seed placement chart and reference where you want the ear seed to go on your ear (always the outer ear, never in the ear canal). Look into the mirror to find that point on your ear. Touch the point with a finger of the other hand not holding the tweezers, and bring the tweezers (with the ear seed on it) to that point. Affix the sticky part of the ear seed onto that exact area, releasing it from the tweezers.
Step 6: Press the seed with your fingertip to set it in place
You want to make sure the ear seed is well anchored on your outer ear. Once you release the ear seed onto the specific acupressure point of your ear, take a fingertip and press on it for a few moments. Think of it like a temporary tattoo that needs the damp cloth pressed onto the back of the temporary tattoo in order for it to “set” just right onto the skin.
Step 7: Use the 4-3-1 rule over the next 4+ weeks
The 4-3-1 rule is our research-backed method to get the most out of your ear seeds. In summary, here’s what it stands for:
- 4 weeks of using the ear seeds — you should remove the seeds every four to six days, but after you remove them and let your ears rest for a bit, go through this 7-step process and apply new ones again; in total, ear seeds should be on your ears for at least for four consecutive weeks, but ideally for six
- 3 times per day of stimulating the ear seeds — this means pressing on them with your fingertips as you apply light to moderate pressure, further activating those acupressure points
- 1 minute of stimulation each time you stimulate them; this can be hard to remember to do if it’s not a habit yet, so we created our version of a habit tracker, except that ours is for ear seeds
Run out of ear seeds? Restock with our My Ear Seeds Refill Kit.
Now you know how to apply ear seeds step by step!
Don’t get discouraged the first time or two you attempt to apply ear seeds step by step on your own and it just doesn’t seem to go as smoothly as you had hoped. We’re dealing with tiny stickers, after all.
Give yourself grace, take a deep breath, and with a steady hand, try again.
You’ll get the hang of it soon enough, and then you’ll have to answer the question, “What’s that on your ears?”
“Those are My Ear Seeds!”

Happy seeding!